Friday, April 8, 2016

Etsy, Low Carb Eating, Silver Sneakers and Pinterest

Posted this same post on my other blog..........Sorry but with the bad internet connection right now, I have to be quick.


Between my art work and my Etsy shop, I'm trying to learn how to eat healthier.  I'm not doing very good.

I HAVE added 3 days of exercise a week and each is 1 hour long.  I do yoga on Monday and Tuesday and Thursday I do some weight exercises.  I've been doing that for about 2 months and it feels good!  It's called Silver Sneakers and it's FREE!

I want to eat less carbs, less is easy but cutting out bread, pasta and crackers is really difficult for me.  I need some really good low carb ideas.  

Low carb easy to make ideas.........easy recipes.  I hate cooking and love to just grab and eat.  Who invented meals anyway.

I think I'll check Pinterest.  Help!  Anyone with any good ideas?  Anyone else want easy "meals"?

OK, guess it's time to go cook, ick!  

Kathy

Saturday, February 13, 2016

Pins Needles and Gems Etsy Store Now Open

I have reopened by Etsy store Pins Needles and Gems and I am really excited!  

I will be listing my handmade jewelry, my crochet and knit patterns, my pin cushions, my mixed media art, watercolor painting and more.

Here's my link again....  Pins Needles and Gems ..... and a sampling:


This is Colorado and a picture of the blue moon 
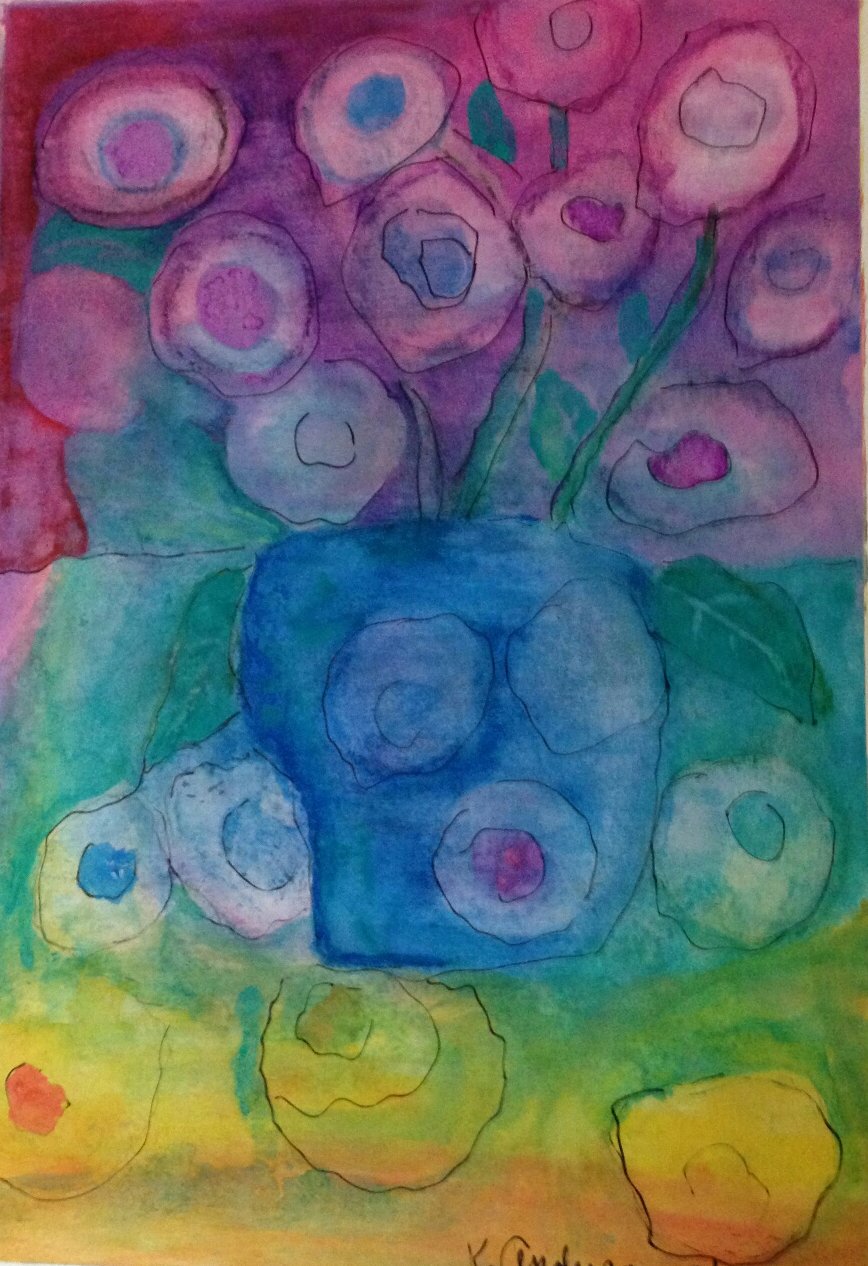
watercolor


Bowl of cherries - colored pencil


Colored pencil
Not for sale


watercolor and alcohol


watercolor, alcohol    

Tuesday, August 26, 2014

Found my Tea Cozy Free Pattern on Another Website!

I was just surfing through my blogs, knitandcrochetpatternchat.blogspot.com, for one, this one, and was checking where page views come from, who is viewing my blogs, etc. and discovered this website that has listed my tea cozy pattern on her website..  I was excited to see that.

Here's her website which has tons of free patterns.  Please check it out.

Free Indie Crochet Patterns

I've been on vacation but will be returning soon to add new patterns and chat with you about knit and crochet patterns, tips and techniques.

Happy Summer!  It's almost over and kids will be returning to school.  It's time to think about Christmas!


Saturday, June 21, 2014

Stitch & Unwind Website

Here's a very good website for your crocheting and knitting......


Mistakes Every Crocheter Makes – Part 1


There is a list of other people's "crocheting woes".

From the site:

"Stitch and Unwind is the official blog for AllFreeKnitting.com, AllFreeCrochet.com, andAllFreeCrochetAfghanPatterns.com. You’ll see post from all three being contributed regularly. Once in a while you might see a post from our friends at FaveCrafts.com as well!"

I didn't realize AllFree website had another blog.  There's knitting help, patterns and giveaways.  If you haven't seen it, please do take a minute to check it out.

Next week:

Look for Part 2 next week! What mistakes have you made?


Hope you enjoy it.

Kathy

Thursday, May 15, 2014

2 Color Brioche Knit Pattern Stitch

Have you ever tried or seen the beautiful 2 color Brioche knit stitch?  Here's a website that is awesome and helpful and beautiful and everything you ever wanted in a website.

The Purl Bee by Pearl Soho  If you scroll down, you'll find the pattern and instructions on how to do the 2 color brioche knit stitch.  Please, leave a comment and let her know you found her here. Just click on all her links.  You'll find tons of helpful information and patterns.  Thank you Purl Bee!!


Sunday, April 27, 2014

Nostepinnes Center Pull Yarn Ball

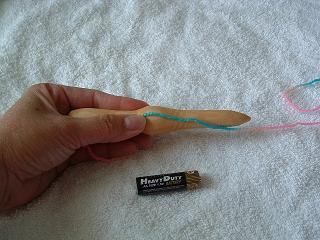
Look what I found!  A tutorial on winding your yarn with a center pull!!  Now I'm not sure what a nostepinnes is but from the pictures, it looks like you could find something else that would work as well.  

The website is +Curiosities808  and here is the link for the tuturial you see below.  Part of it, as I didn't want to step on any toes.  You need to go to her website to see the tute.

Please leave a comment so she knows you've been there and appreciate her help.


She's an awesome beautiful young lady living in Hawaii.  She loves creating and is very curious about painting, embroidery, crocheting.  She loves wool, knitting and yarn!

See the rest of the tutorial HERE


Thursday, April 17, 2014

Knit and Crochet Websites You Need to SEE

Here's a wonderful website showing you her pompoms........she loves them!

POM-POMS      

She shows you how to make them in 9 easy steps.  She's on Facebook as Craft Share.

Please go HERE and read the beautiful story about the bird nest.  Also, check out all her wonderful photos and crochet patterns and projects.

It's such a wonderful thing to see.

Oh my, check out the rose and the lace scarf.  Many links take you to another site but it's worth doing.  I'd post some pics but I don't want to infringe on their copyrights.


Another great site to visit

Look HERE, too, to see how to make a hairpin lace tool.  Why didn't I think of that?

make your own hairpin lace loom

Now that I"m done here, I'mb going to check out more links on I Love Pom-Poms blog!

More later.

Thursday, March 27, 2014

Mochimochi Patterns

  Adorable Knitting Site with Mochimochi Patterns


I found this great website for you.  You can buy her patterns and her website explains how and where you can find them.  Don't miss out!  Look at her blog, too.  She has "helps" to make her little tiny patterns.

Have you ever heard of mochimochi?  I'm not sure what it means but it sure is cute!
I spent quite a bit of time on her website just giggling and truly enjoying her creations.  She's quite talented.   You'll giggle when you see the pigs with wigs and a tiny little umbrella!  Make sure you see the toilet paper!

She has some free patterns:
Captain Capacitor
Toilet Paper Roll
Tiny Perching Pigeons


The yarns she uses the most are fingering yarns. 

Along the right are her free patterns ~ you must go check them out.  You'll find pigs with wigs and a tiny little umbrella!

Please check out all my blogs:

Knit and Crochet Pattern Chat
Arts and Crafts dot COM

If you're interested in our motorhome travels, you'll find me at:


Fulltime RV Travel Fun

AND if you're interested in reading my RV park reviews:


RV Park Reviews

Sunday, March 23, 2014

Crochet Turning Chain Alternatives

Crochet Turning Chain Alternatives

Mr. Miccawbar's Recipe for Happiness blog!!  

This is what Mr. Miccawber has to say.  This 
is just an excerpt..........please check out 
the blog for the rest of the information.  
You won't be sorry.  This is awesome 
and so is the blog!  Please, leave a 
comment for me if you wish to see 
more crochet helps........I'll be adding 
more knitting helps also.  So let me know; 
knit or crochet or both!  But please comment 
so I know if this blog is helpful.


"Crochet Turning Chain Alternatives

Ch 3 (counts as first dc), turn.

These are some of the most familiar words 

in the crocheter's language. They signal 
the end of one double crochet row and the 
start of another. That chain 3 works to get 
your yarn up to the proper height for the 
next stitch. It's also (in my opinion) a fiendish 
ploy designed to drive the stitcher crazy.

You know what I mean - you've been there 

yourself. You're zipping along, you and your 
hook, dancing through the yarn and 
crocheting like the dickens, when all of a 
sudden you reach the end of the row.
 Screech! The happy momentum comes 
to a crashing halt as you poke around in 
the turning chain, looking for the right place 
to put your last stitch"...............

New Crochet Project

We're just about to get on the road again after spending all winter at Rio Bend RV park as workampers........I've been teaching Zumba Fitness and my husband working in the maintenance department.  When we're on the road, we're heading home to Washington State, I love to knit or crochet.

My next project will be to make another of those chair arm bags only this time I want to use plastic grocery bags.  I think it'll have less sag and more stability.  It's been so nice to have it hanging there with my journal, puzzles, pens, pencils and phone right at hand.  It's big enough to add a little snack, too.

So here it is repeated:


Ok, so here's the pattern as promised.  If you crochet, you know how to make adjustments for your chair arm.  Make sure you measure. 

Chair Pocket

Cotton yarn
G hook
Gauge isn't that important

Chain 40

Round 1, SC in 2ndh chain from hook and each chain to end, SC 3 in end chain and do not turn but continue crocheting around the other side of the 40 chains adding 2 in the end stitch.

Rounds 2 and 3, repeat round 1 so you have 3 rounds with increases on each end.

Round 4, SC in each stitch around with NO increases for about 3 rows, or desired number of rows to make a more solid bottom.

Round 6, if you want, change to a DC around each row for about 17 or desired size of pouch.  

Because you crocheted around, the stitches/rows tend to twist so begin next row by slip stitch to the corner so the flap goes straight up the side.  About 4 sts.


Now crochet in rows going back and forth to the desired length so that it fits around the arm of your chair.  I am using mine on a passenger seat in the motor home so they are quite thick and big.  I did 35 rows and then:

If you want a contrasting color, I had to because I ran out of the orange, attach it at the top in corner going down the side of the flap till you get to the pouch, sc across the top of the pouch and back up the other side of the flap.  End off.

Try the pouch on the arm and determine where the buttons should go.  I used 3 but 4 might be better depending on the width of your pouch.  Sew on buttons and use the spaces between the DC as button holes.  Waalaa!  Chair pouch!

I would love to see your finished project if you could send me a picture I'll post it.  kma2053@gmail.com  Thank you and comment, too, so I know if you like to see more free patterns.

Don't miss the filet crochet patterns I have for sale, too.

Thanks for visiting and happy crocheting!

Kathy

Jogless When Crocheting Stripes

 example of crocheted stripes without the jogless method


Have you ever ever had this problem?  Of course you have unless you've seen this awesome website with a tutorial on how to avoid this jog when crocheting in the round.  Find it here:

Needle Noodles website

Excerpt taken from her website:

"Tutorial: Crocheted Jogless Stripes


A common problem in amigurumi: you want to crochet something striped, but there's this funky looking stairstep "seam" running diagonally where you change colors. How do you get rid of that!?


EDIT: I've also put together a pair of videos showing this technique in action. You can view them here:
  "

 
http://needlenoodles.com/home/node/165

So go ahead and take a look and come back for more helpful hints and websites that can help make your needlework look more professional and beautiful.  We can all learn something new.

Happy creating!!

kathy


Saturday, August 3, 2013

Knit and Crochet Pattern Chat and Creative Assist Have Become One!

Knit and Crochet Pattern Chat have combined.......Yes I have another blog called Creative Assist which I am going to combine with this one; Knit and Crochet Pattern Chat.  So soon that one will not be kept up-to-date but all help and assistance I find for knitting, crocheting, etc. will be posted on this blog. Thank you for visiting and post or comment with any problems you have and I might be able to help you or find help for you.

Happy hooking!   kathy

Here's that blog URL: Creative Assist

and here's a sample:

Crochet Help The Magic Ring

Do you need help learning the magic ring for crochet?

I found this excellent website and I'm sure there's others. 

Planet June  She has an great picture tutorial.  I always think I know how to do it but then find myself referring back to her website for help.

magic ring vs traditional methodNO HOLE!

Let her know I have sent you her way.  Us bloggers and website owners love hearing from the people that are enjoying our posts.  Don't be shy........please comment.  You can even tell me what help you would like to see.

Happy hooking!

Kathy

Tuesday, June 11, 2013

Crochet Turning Chain Alternatives

Crochet Turning Chain Alternatives

Mr. Miccawbar's Recipe for Happiness blog!!  

This is what Mr. Miccawber has to say.  This 
is just an excerpt..........please check out 
the blog for the rest of the information.  
You won't be sorry.  This is awesome 
and so is the blog!  Please, leave a 
comment for me if you wish to see 
more crochet helps........I'll be adding 
more knitting helps also.  So let me know; 
knit or crochet or both!  But please comment 
so I know if this blog is helpful.


"Crochet Turning Chain Alternatives

Ch 3 (counts as first dc), turn.

These are some of the most familiar words 

in the crocheter's language. They signal 
the end of one double crochet row and the 
start of another. That chain 3 works to get 
your yarn up to the proper height for the 
next stitch. It's also (in my opinion) a fiendish 
ploy designed to drive the stitcher crazy.

You know what I mean - you've been there 

yourself. You're zipping along, you and your 
hook, dancing through the yarn and 
crocheting like the dickens, when all of a 
sudden you reach the end of the row.
 Screech! The happy momentum comes 
to a crashing halt as you poke around in 
the turning chain, looking for the right place 
to put your last stitch"...............

Free Chair Pocket Pattern is Finally Here


Ok, so here's the pattern as promised.  If you crochet, you know how to make adjustments for your chair arm.  Make sure you measure. 

Chair Pocket

Cotton yarn
G hook
Gauge isn't that important

Chain 40

Round 1, SC in 2ndh chain from hook and each chain to end, SC 3 in end chain and do not turn but continue crocheting around the other side of the 40 chains adding 2 in the end stitch.

Rounds 2 and 3, repeat round 1 so you have 3 rounds with increases on each end.

Round 4, SC in each stitch around with NO increases for about 3 rows, or desired number of rows to make a more solid bottom.

Round 6, if you want, change to a DC around each row for about 17 or desired size of pouch.  

Because you crocheted around, the stitches/rows tend to twist so begin next row by slip stitch to the corner so the flap goes straight up the side.  About 4 sts.


Now crochet in rows going back and forth to the desired length so that it fits around the arm of your chair.  I am using mine on a passenger seat in the motor home so they are quite thick and big.  I did 35 rows and then:

If you want a contrasting color, I had to because I ran out of the orange, attach it at the top in corner going down the side of the flap till you get to the pouch, sc across the top of the pouch and back up the other side of the flap.  End off.

Try the pouch on the arm and determine where the buttons should go.  I used 3 but 4 might be better depending on the width of your pouch.  Sew on buttons and use the spaces between the DC as button holes.  Waalaa!  Chair pouch!

I would love to see your finished project if you could send me a picture I'll post it.  kma2053@gmail.com  Thank you and comment, too, so I know if you like to see more free patterns.

Don't miss the filet crochet patterns I have for sale, too.

Thanks for visiting and happy crocheting!

Kathy

Thursday, August 1, 2013

FREE Crochet Pattern in the Writing Stage

I am working on my version of the chair pocket pattern.  It's just a different stitch and being my chair arm is so different, there needed to be some revisions.

I must apologize that my chair pocket is weird........I ran out of the orange cotton yarn and finished with another color but, hey!, hit's for me and I really didn't care.

I'll come back tomorrow and post the pattern and a picture.

Happy crocheting!

Kathy

Wednesday, July 3, 2013

Free Pattern Coming! Crochet Chair Pocket

I was shown a pattern on FreePatterns.com.  It's called a chair pouch and crocheted with a different stitch than usual (a ds stitch which is a double stitch) and with nylon.  Great idea. 

I don't have any nylon to crochet with so am using cotton and I'm using a normal sc and a dc stitch.

I will be posting my pattern as soon as I can.  That pattern is also free so check it out, too.  I'm not saying mine is better, I like them both.

This pattern was drawn to my attention by a sweet lady on a crocheting yahoo group.  Thank you so much Lisa and she has a neat website.  Please check it out, too.

http://stretchyourdollarwaukesha.wordpress.com/

Happy crocheting!
Kathy

Tuesday, June 25, 2013

Baby Patterns - Filet Crochet


Filet crochet is another one of the things I love to design. These are just a few I'll be posting today that ARE FOR SALE. The patterns are generated by me using a filet crochet program created by Sandcastle Designs, Inc. so if you have any questions, you can contact them for help. 

I am selling them for $1.00 each or the set of 12 for $6.95 plus shipping if shipped.

Pattern Set 44: Baby Gifts and Necessities This set is just for Baby. Matching bibs, blankets, burp towels and lace. They come in sweet little bows, pretty geometric diamonds and lovable hearts. The lace and blankets were designed with repeatable patterns so you can decide how big to make them. Let your imagination run wild. Make pillow trim, curtains, bed linens, shelve trim, pillow covers, throws and table runners. Just repeat and go. By K. Anderson designs.

Diamond Afghan
Matching Diamond Bib
      
Matching Diamond Lace
Matching Diamond Burp Cloth

Heart Afghan
Matching Heart Lace
 
Matching Heart Bib

Matching Heart Burb Cloth

Bow Afghan
Matching Bow Lace
Matching Bow Bib
Bunny Afghan


Baby Bib Patterns:
Finished Sizes: Thread size 5: 15.8 inches x 22.8 inches, Thread size 10: 13.1 inches x 18.0 inches, Thread size 20: 12.5 inches x 17.3 inches, Thread size 30: 12.0 inches x 16.6 inches

Baby Lace Patterns:Finished Sizes Thread size 5: 5.5 inches x as long as you desire as it's worked from the end.

Baby Burp Towel Patterns:
Finished Sizes Thread size 5: 12.7 inches x 23.1 inches, Thread size 10: 10.6 inches x 18.2 inches, Thread size 20: 10.1 inches x 17.5 inches, Thread size 30: 9.7 inches x 16.8 inches

Baby Blankets/Afghans:Finished Size depends on yarn type and your personal gauge. Patterns are created for adjustments.

The pattern instructions are given for 7 different types of threads/yarns; from size 5 crochet thread all the way up to worsted weight using an I hook. Very versitile patterns. Cottons are the best for the bibs and burp towels for maximum absorbancy.


Patterns can be printed and mailed to you snailmail or I can attach them to an email. Add $1.50 for printing and regular mail shipping OR it can be shipped priority.  Priority prices will be in effect.


I prefer PayPal payments. PayPal ID: kma2053@gmail.com


home contact info


Copyright © 2007 knitandcrochetpatternchat - an online creative place All rights reserved


Monday, June 10, 2013

Color of Summer Week 1

Week one of the Color of Summer challenge has begun!  Want to join?  Go to my last post and click on the link.

Here's my first submission for this challenge.


I did this painting with spray inks, acrylics, markers, pens and Portfolios

The colors this week were Citron and turquoise.

Tell me what you think.  Please, leave a comment and let me know you've been here whether or not you like my painting.  Please and thank you.

Kathy

Monday, June 3, 2013

Color of Summer

Please check out and sign up for the Color of Summer!!

Excerpt taken from her website and I hope you will join us!


"Hellooooo and thank you for the rockin' introduction to our first interactive affair, The Summer of Color 3: Artist's Choice! Wether you're new to the event or you've been waiting a year to begin again, I promise that this will be one to remember. So get ready for six weeks of luscious color prompts, weekly linking opportunities, beautiful giveaways, creative inspirations and an amazingly supportive community that You, the Artist, help to produce. 

What's that you say?
That's right. This year, the SOC is taking a decidedly different turn. This year, You will help determine the colors we'll be playing with by voting for your favorites on a weekly basis.

How will that work?
Easy. Each week, you'll have the chance to vote for one of 12 different color combinations by taking a poll at the end of each post. Simply pick your favorite and, in majority rules fashion, the highest rated one wins. Come back the following Monday to see the results and get started. As always, you'll work in your preferred mediums - creating anything your little heart desires - with color being the only stipulation."..............................


I, personally, am joining and can't wait to begin.  Spread the word and come join us!!


Monday, May 20, 2013

Quick Post about Knit and Crochet Pattern Chat Blog

AND it's future.  Knitting and crocheting isn't the only things that I do.  I've been sitting here thinking about what this blog means to me and what I really want it to be for you.

I have so many likes, dislikes, interests and real loves of so many different crafts and so many people don't understand how I can do so much and do it well.  It's not all that bad to do so much.  I was always told to stick to one thing and learn it well but I am not the type of person that can do that.  Nope, not me.


I find nothing wrong with loving to do more than one thing, hobby, or interest at one time.  Afterall, many women love their husband, their children, love to sew and cook........hey, that's more than one thing.  I've done a real close look at my loves..........


I started out with fiber arts, that a more professional way of saying knitting and crocheting.  My Mother was making a knitted afghan out of square blocks of knitted yarn in dark colors.  I remember purple and blues for sure.  I helped her knit them at the age of 10.  Lots of us started knitting and crocheting at a very young age. Many say, "I've been knitting all my life!"  And many many have been, just as I feel I have been.  I would love to hear from all of you who would like to share what age you were when you learned to knit or crochet.  Did your mother teach you?  Your grandmother?  Let me know in the comments.  


Do you want to know my likes in crafting, needlework, etc?


I started with knitting as I stated above.  I knew I loved art and did lots of drawing and painting as a child.  I remember using bottle caps, erasers, toys and drew geometric patterns coloring in all the areas with bright colors.  We only had crayons at that time.


We, my sister and I, as we got older would draw rooms or just one corner of a room and worked so hard at getting the perspective correct.  Of course, we didn't know it was perspective.......it was just the corners.  Art was my favorite subject in school.


Then I learned to sew in school; middle school and high school, as part of Home Ec. I always took on the hardest patterns I could find.  I once tried to make a plaid men's sport coat!  At age 15!  I didn't know how to match plaid and a sport jacket?!  What was I thinking!  My poor Mother just shook her head and said she couldn't help but I did finally get it done.  Amazing!


Then after I got married and became a stay at home Mom, I learned how to crochet and embroider and kept going with my painting.......this time pictures not geometric patterns.  I tried oils but didn't like the smell nor how long it took to dry.  I continued sewing and made all my own clothes and those of the kids. I used to create my own patterns by taking parts of one and combining it with another.   I also have always cut our hair.......even my husband's and I still do to this day.  The kids take care of their own now that they are in their 30s and 40s, but I still cut my own.


I really got into crafts when most everyone did.  Remember the big craft surge, craft sales, and shows?  Was that in the 90's.........early 90's, I think.  I made it my full time job while the kids were off to school everyday.  I had my own band saw and sander.  I designed and painted all my wood items to sell.  I did that for about 10 years till things just weren't selling anymore, the crowds got smaller and sales almost quit!  I was doing shows and was in about 3 consignment shops.  Remember them?


I continued to design and became a craft designer for that industry traveling about every 6 months to sell my designs.  I went to NYC, Dallas, Orlando, MPLS, Chicago, places in CA and also took the test to become a Professional Craft Designer and Professional Craft Demonstrator at the trade shows.  I worked for Plaid, Syndicate Sales, and a few others.  I loved every minute of it.


Here we are to today.  I continue to craft, knit, crochet, paint and create!  I have added crochet jewelry, beading, working with wire, I love Kumihimo, working on our family tree, acrylic painting, filet crochet design, watercolor painting, mixed media and love love love paper........I make albums, journals and paper beads.  I can't wait to add, polymer clay bead making and calligraphy.  Oh there's so much to do and so little time.  Have you heard of Viking knitting with wire!!??


I will be showing you all the things I've created.  It's going to take some time but I hope to be able to go back and show you what I have done.  If you've followed this blog or have gone into the archives, you can see some of the stuff or you can go to artsandcraftsdotcom.blogspot.com to see even more.


I have tons of filet crochet patterns I can share and some I can sell you, I have lots of jewelry to share, my crocheting, painting, on and on.  So stay tuned.........


Don't forget to tell my about your knitting and crocheting beginnings.  I'd love to hear from you!


Keep creating!

K


Saturday, May 18, 2013

Free Crochet Pattern for a Tea Cozy


As promised, I will post a new and improved crochet pattern for my tea cozy.  I love love tea, don't you?  A hot cup of tea on a drizzly chilly rainy morning........oh, so good.

I posted a not-real-good picture of my purple one a month ago or so.  Where does time go!?  At least a month ago but I'm too lazy to go find out the exact date.  


I finally finished what I think is a tea cozy that should fit most round pot belly type tea pots.  It doesn't hurt to continue to measure as you go.  You do want it to fit?  If you do not join at the end of the rounds, make sure you use a marker.


I made two cozies and put one inside the other.  I also made the inside one a bit longer with a different colored edge so it showed beneath the upper one. Please read through instructions first and test your hook and yarn for the gauge.


Here we go:


Crochet hook size H

cotton yarn such as Sugar and Cream
I used one really large skein of Bernat bought at JoAnns, must have been a pound or two.  I don't have the label anymore
GAUGE:  8 STS TO 1" AND 5 ROWS TO 1"


1.  Chain 2, 8sc in 2nd chain from hook, join


2.  2 sc in each sc around, join  (16 sts)


3.  1 sc in first sc, (2 sc in next sc, 1 sc in next sc continue around in this manner) (24 sts)


4.  2 sc in first sc, (2 sc, 2 sc in next stitch, continue around in this manner) (32 sts)


5.  2 sc in first sc, (3 sc in next stitch, continue around in this manner)  (40 sts)


6.  2 sc in first sc, (4 sc, 2 sc in next stitch, continue around in this manner) (50 sts)


7. sc around one row


8.  2 sc in first sc, (5 sc, 2 sc in next stitch, continue around in this manner) (60 sts)


9.  sc around one row


10.  2 sc in first sc, (6 sc , 2sc in next stitch continue around in this manner) (70 sts)


11.  sc around one row


12.  2 sc in first sc, (7 sc, 2 sc in next stitch continue around in this manner) ( 80 sts)


13.  sc around one row


14.  2 sc in first sc, (8 sc, 2 sc in next stitch continue around in this manner) ( 90 sts)


15. and 16.  sc around


17.  2 sc in first sc, (9 sc in next stitch continue around in this manner) (100 sts)


18.  Now the tea cozy will begin cupping, or it should (LOL not funny I know) so continue with as many sc rows you need to make the cozy the length you want minus about 1".


When you reach this point:


1.  DC in each sc around, join if you are doing so or just keep going around.  Make sure you have the beginning marked.  


2.  Dc around dc from previous row from front to back making a post, dc around dc of previous row from back to front making a post and continue around.


3. Repeat rows one and two till the desired length.


4.  Sc around to finish


5.  Crochet a loop and attach it to the top


NOTES

I made mine double thickness so made another one and slipped it over the top of the first one.  They fit snugly.   The top one can be shorter than the underneath one or can be the same length.

If it isn't cupping or might be too big for your tea pot, you can decrease evenly about 5 stitches every few rows so you need to think ahead.


I sometimes change colors during this section of the process to make stripes.  You can join at the end of every row or not.  That's up to you but it does make for a neater finish if you plan on changing colors.

If you find any errors, please let me know........I wrote this as I worked so it should be correct.


Happy crocheting!